Tutorial 3: RLlib (4) — Reinforcement Learning with RLlib in the Unity Game Engine
A Unity3D game world: Learning complex behaviors in arbitrary virtual worlds — from scratch and without much supervision — will become the norm in a few years thanks to deep reinforcement learning and tools like ML-Agents and Ray RLlib.
One or two decades ago, the term “Game AI” was reserved for hard-scripted behaviors of the likes of PacMan’s opponents or some more or less sophisticated seek-, attack-, and hide algorithms, used by enemy- and other non-player characters.
More powerful methods for creating the illusion of intelligent agents inside games — behavior trees and utility functions — came up next, but all of these still required a skilled AI programmer to write a plethora(过多)of relatively static, inflexible behavior code.
Deep reinforcement learning is an upcoming, not-so-academic-anymore technology, which allows any character in a game (or in any non-gaming, virtual world) to autonomously adopt useful behaviors, simply via a learning-by-doing approach.
In this tutorial, we will train different agents inside the Unity3D game engine, thereby observing that their initial clumsy(笨拙的)behaviors become more and more sophisticated and clever over time. We will use Ray RLlib, a popular open-source reinforcement learning library, in connection with Unity’s ML-Agents Toolkit, to cover the heavy-lifting parts for us.
Setup for the Experiments ahead
We will use the Unity3D editor as our simulation engine, running the game environment. Furthermore, we will activate the ML-Agents plugin inside the editor to allow our game characters to send observations and receive actions using ML-Agents’ TCP-based communication protocol.
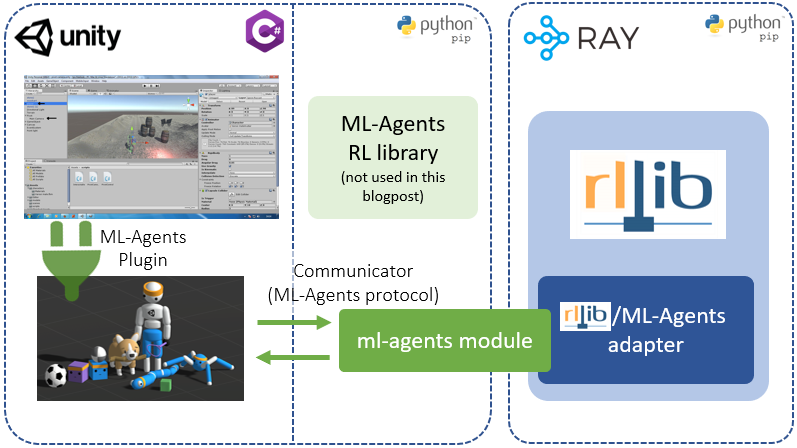
On the reinforcement learning end, we will run Ray RLlib, importing ML-Agent’s python module (to be able to communicate over TCP), and using an adapter that translates between ML-Agent’s and RLlib’s APIs.
An alternative setup would be to replace Ray RLlib with ML-Agent’s own RL-library (see figure). There are many differences between the two RL-backends and a detailed analysis would be beyond the scope of this post. But in short, RLlib caters more to reinforcement learning researchers and heavy-duty industry users due to its advanced features, and capabilities for parallelization and algorithmic customization. ML-Agents RL library, on the other hand, addresses the needs of game developers, who prefer an easier to set up and more simplified API, usable by non-experts without losing the capability to solve complex RL problems.
Getting started — Installing all prerequisites
We need three things to get started: The Unity3D Editor, some python pip installs, and the ML-Agents example environments.
-
Installing Unity3D
Head over to Unity’s download site and follow the instructions on how to install the engine on your computer. I found it useful to handle my Unity projects via the Unity Hub that comes with the installation. From there you can manage your engine versions (e.g. add build modules) and game projects. We will start with the engine version 2020.1.17f1, which worked without problems with the other dependencies described below.
-
Installing Ray’s RLlib and Unity’s ML-Agents Toolkit
Do three simple pip installs from your command line, best all in one line (again, assuming here that you have Python >= 3.6 already installed on your machine):
pip install ray[rllib] tensorflow mlagents==0.20.0Quickly try things out to make sure everything is ok, by typing on the command line:
import ray from ray.rllib.agents import ppo import mlagents -
The ML-Agents example environments
Download this zip file here and unzip it into a local directory of your choice. In the Unity Hub, go to Projects and add the project located within the zipped folder (click “ADD” in the Unity Hub Projects tab, then navigate to [unzipped folder]/Project and click “Open”):
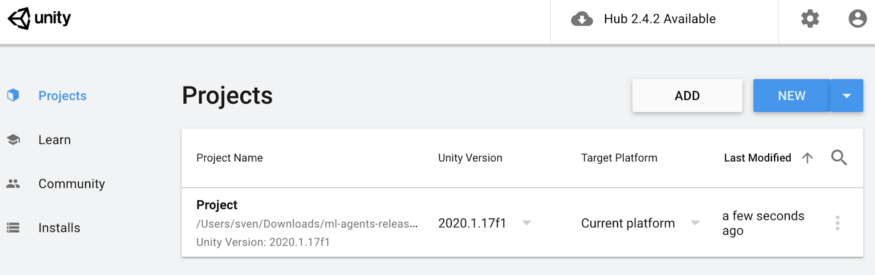
Then open the added project by clicking on it in the Hub. You may have to upgrade the Project’s Unity version to the one you just installed (e.g. 2020.1.17f1) and confirm this before it starts up.
If all the above commands work without errors, we will all be set to start loading and modifying our first game and do a quick AI training run on it.
Our first example game — Balancing balls (a lot)
Let’s load our first scene (“3DBall”) into the opened Project and make sure we apply some necessary settings inside the game in order to make it “learnable” by RLlib. Click on “File->Open Scene” in your Unity editor and navigate to the downloaded (zip from above) ml-agents folder, inside of which you should be able to select: Project-> Assets-> ML-Agents-> Examples-> 3DBall-> Scenes-> 3DBall.unity
You should now see a scene roughly like the following:
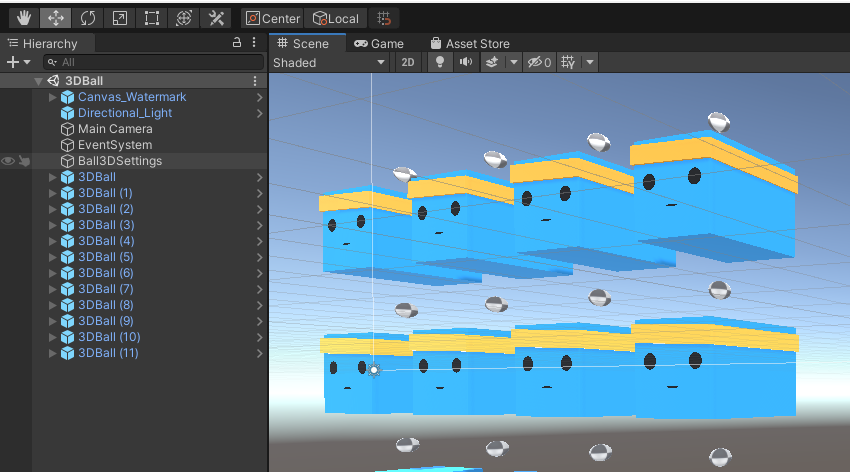
Our (still untrained) agents are the blue cubes and their task is to balance the grey balls such that these don’t fall down. If they do, the respective agent will be “reset” and a new ball appears on top of it. Now, clicking on the “3DBall (x)” links inside the Hierarchy panel on the left, should open the hierarchy for each agent.

… and clicking on “Agent” within each “3DBall” should open an “Inspector” panel on the right side of your screen. In that panel, make sure that for every agent, the property “Model” is set to “None (NN Model)”, which means that we will train the neural network of this agent ourselves (and not use a built-in, already trained one).

Now let’s press the play button in the top center of the screen

and watch our agents act. You can see that the agents don’t do anything and the balls keep falling down. Well, let’s fix that and make our cubes smart: RLlib to the rescue! Press Play again to stop the running game. In order to get the code that we’ll be working with in this tutorial, you can either git clone the entire Ray RLlib repository (which will have the script we’ll be using in the ray/rllib/examples/ folder), or just download the example python script here.
After you downloaded the script (or cloned the repo), run it via:
cd ray/rllib/examples
python unity3d_env_local.py --env 3DBall
Note that the 3DBall environment is known to the above script (so are other Unity3D examples as we’ll see later). However, all the script needs to train any arbitrary game is the game’s “observation-” and “action spaces”. Spaces are the data types plus shapes (e.g. small RGB images would belong to a [100x100x3]-uint8 space) of the information that the RL algorithm gets to see at each game tick (time step) as well as the space of the action decisions that the algorithm is required to output (e.g. a Pacman agent has to chose each timestep from 4 discrete actions: up, down, left, and right).
After a few seconds, the script will ask you to press the “play” button inside your running Unity3D editor. Do so and watch what happens next: Your agents will start acting — wobbly and randomly at first — as well as learning how to improve over time and become better and better. Keep in mind, though, that getting from random movements to actually smart behavior will take some time. After all, we are only running a single environment (no parallelization in the cloud), with some built-in vectorization (12 agents practicing at the same time).
After about 30min of burn time (this may vary depending on the compute power of your machine), you should see the agents having learnt a perfect policy and not dropping any balls any longer.
The script makes sure it saves progress every 10th training iteration in a so-called “checkpoint”. You should be able to find the checkpoints under ~/ray_results/PPO/PPO_unity3d_[]... . If you stop the game now and take a look at this folder, you should see some checkpoints in there. You can — at any point — pick up training from an existing checkpoint, by running our script with the following command line options:
python unity3d_env_local.py --env 3DBall --from-checkpoint /my/chckptdir/checkpoint-280
Even though we won’t go into any details regarding RLlib (or RL itself) in this tutorial, feel free to browse around in the unity3d_env_local.py script we have been using so far. You’ll see that we can change some parameters which control the learning behavior. For example, the learning rate (“lr”), an important parameter in machine learning, can be increased in order to learn faster (albeit(尽管)making the process more unstable and learning success less likely) or decreased. You can also change the neural network architecture by changing the value under the “fcnet_hiddens” key. It determines how many nodes each of the neural network layers should have and how many layers you want altogether.
Upping the difficulty — Solving a multiplayer game
Now that we know how to set up a simple scene in Unity3D and hook it up to RLlib for autonomous learning, let’s up our game and move on to a slightly more difficult arena, in which two different types of agents have to learn how to play against each other. We’ll once more use one of the already existing Unity examples: Soccer — Strikers vs. Goalie. Well, the name is quite explicatory, two strikers(前锋), both of them on “team blue” have to pass around a soccer ball and try to shoot it into the purple goal (see screenshot below). The goal on the other side of the arena has been closed by a wall; how convenient … for the strikers. A single goalkeeper(守门员)(team purple) must try to defend this goal:
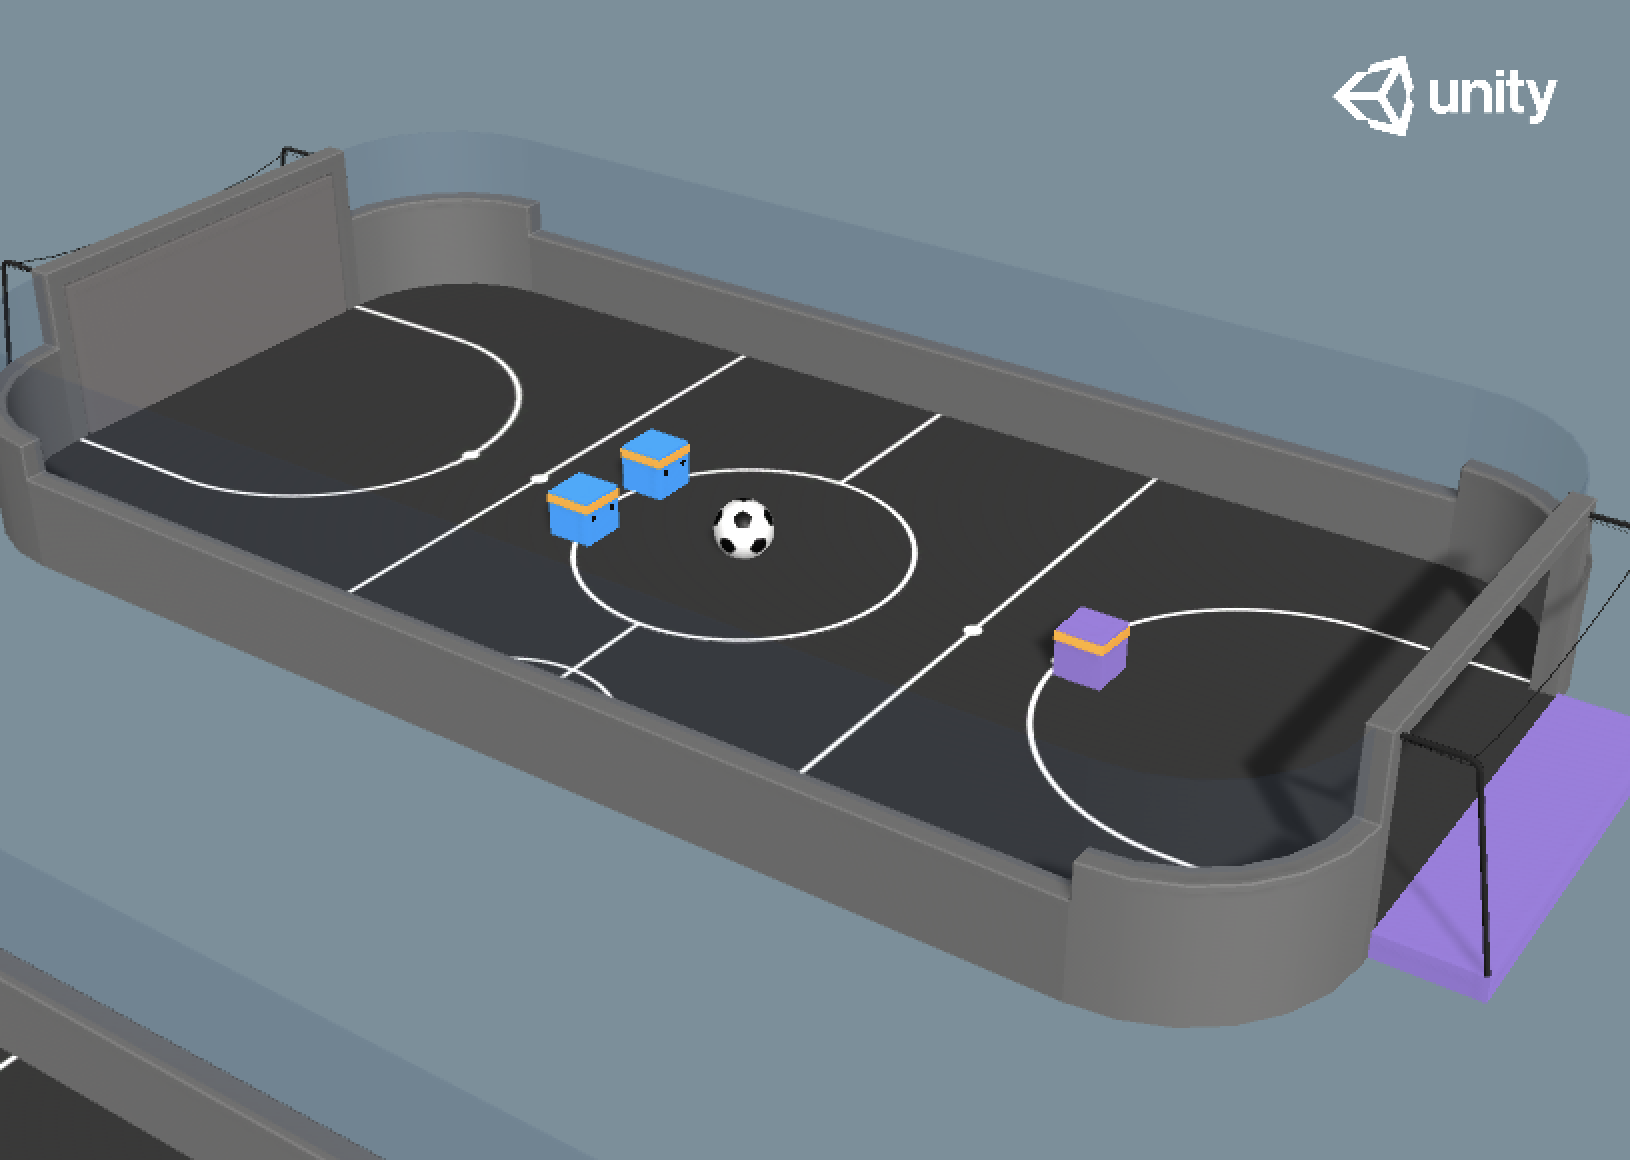
The “Soccer — StrikersVsGoalie” example environment of ML-Agents: We will use RLlib to train two different policies: The two blue strikers will try to score by passing the ball across the goal line (purple field on the right side). The purple goalie will try to defend the goal.
The RLlib setup we’ll be using for this task is a little bit more complicated, due to the multi-agent configuration (take a look at the exact config being assembled in the script for the “SoccerStrikersVsGoalie” case). Again, feel free to either clone the entire Ray RLlib repo (with the script in it) or only download the single script from here. To start the training run, do:
python unity3d_env_local.py --env SoccerStrikersVsGoalie
After clicking play again in the Unity editor, training will start and you should see both teams randomly acting in the arena. You can tell that this is already a much more complex task and if we kept this running in only one editor instance it would take many hours for the two teams to play in a way that somewhat resembles actual soccer. Stop the running script.
So how do we speed things up a bit? We could move stuff to the cloud, but we don’t want to do this for this tutorial. Instead, let’s simply parallelize on our local machine.
First, we’ll compile our game into a “headless” (no graphics) executable. Click on File -> Build Settings, then make sure your configuration roughly looks like this (make sure you tick Server Build for a headless version and the correct operating system of yours):
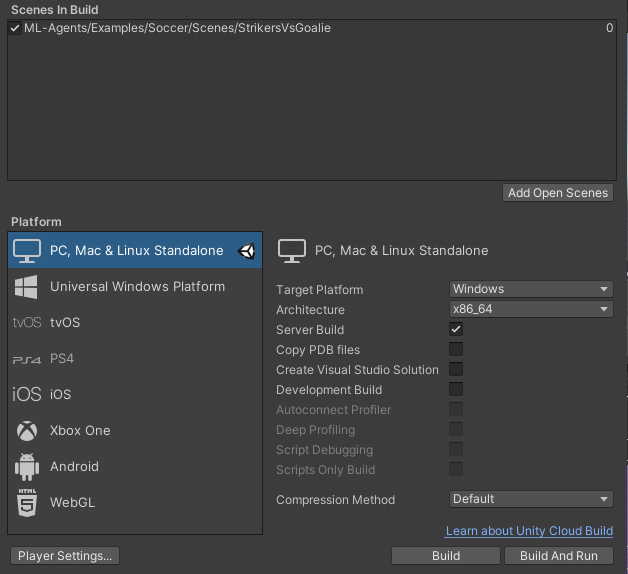
Click “Build” and choose an existing target folder for your executable. Make sure the folder is empty as I often ran into problems with compile errors and dlls not being copied correctly. If the build goes well, you should see your executables like this (depending on your OS, your files may differ):

Restart the script with the same command line as before, except this time specify the compiled executable and the number of “workers” we would like to use:
python unity3d_env_local.py --env SoccerStrikersVsGoalie --num-workers 2 --file-name c:\path\to\UnityEnvironment.exe